 Save
Save There's something almost magical about watching chocolate transform into silk when you fold it into whipped cream. My aunt taught me this mousse years ago, and what struck me most wasn't the technique—it was how she let me taste the chocolate at each stage, explaining why temperature mattered and why patience with the folding made all the difference. That lesson stuck with me far more than any recipe card ever could.
I'll never forget the first time I made this for a dinner party where someone mentioned their love of chocolate but complained that most desserts were either too heavy or too airy. I piped this mousse onto individual cakes that night, and watching their face light up when they took that first bite told me everything. They came back to the kitchen asking for the recipe before they'd even finished their plate.
Ingredients
- 200g semi-sweet chocolate (55–65% cocoa), chopped: Quality matters here more than anywhere else in this recipe, since chocolate is the star—skip the baking chips and reach for real chocolate bars or quality baking chocolate, because the difference is genuinely noticeable on your tongue.
- Pinch of salt: Only add this if your chocolate is unsalted; it brightens the flavor and makes the richness sing without tasting salty.
- 1 cup heavy whipping cream, cold: This needs to be genuinely cold from the fridge, not just cool—cold cream whips faster and holds its structure better, which is your secret weapon for fluffy mousse.
- 2 tablespoons powdered sugar: Start with this amount and taste as you go; some people love sweeter mousse, others prefer to let the chocolate shine, so adjust based on what speaks to you.
- 1 teaspoon pure vanilla extract: Use real vanilla here if you can—it adds a subtle depth that complements chocolate in ways imitation extract simply cannot.
Tired of Takeout? 🥡
Get 10 meals you can make faster than delivery arrives. Seriously.
One email. No spam. Unsubscribe anytime.
Instructions
- Melt the chocolate gently:
- Place your chopped chocolate in a heatproof bowl and set it over a pot of barely simmering water, stirring occasionally until completely smooth—or pulse it in the microwave in 20-second bursts, stirring between each one. The key is patience; chocolate burns easily, and burned chocolate tastes bitter no matter what else you do.
- Let it cool just right:
- Spread the melted chocolate on a small plate and let it cool to room temperature, which usually takes about 10 minutes. You want it still pourable but no longer warm to the touch, because adding hot chocolate to whipped cream is how you end up with scrambled cream instead of mousse.
- Whip your cream with intention:
- Pour that cold cream into a cold bowl, add the powdered sugar and vanilla, and start whipping with a hand mixer or stand mixer on medium-high speed. Stop the moment soft peaks form—when the cream holds a gentle shape but still looks smooth and slightly droopy—because overwhipped cream turns grainy and the texture of your mousse suffers.
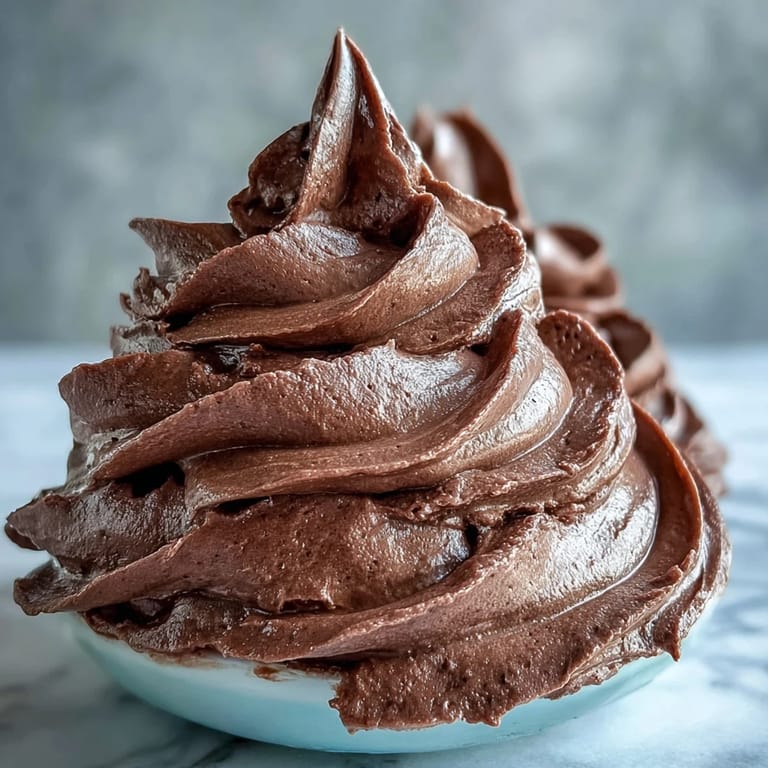
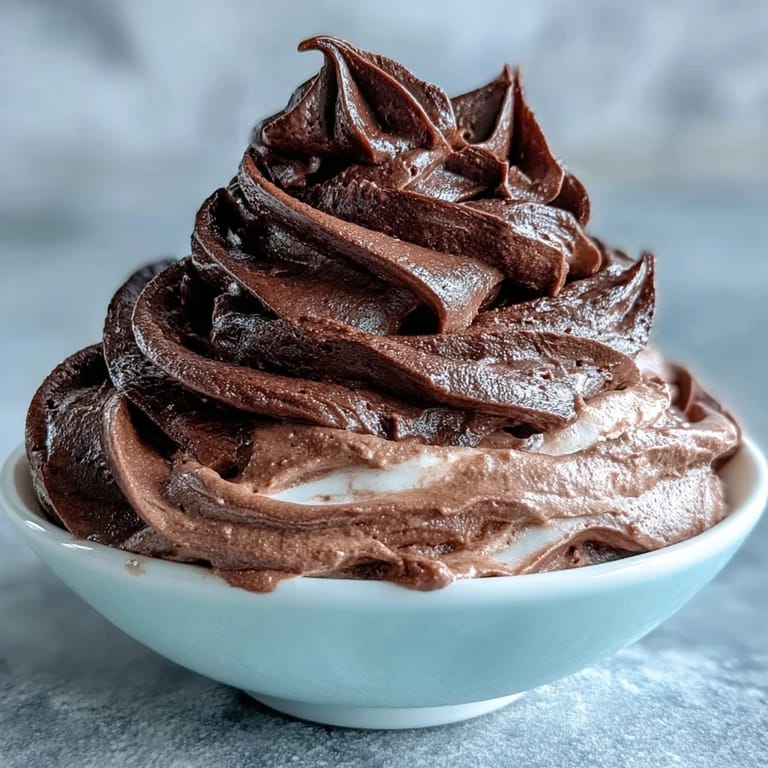
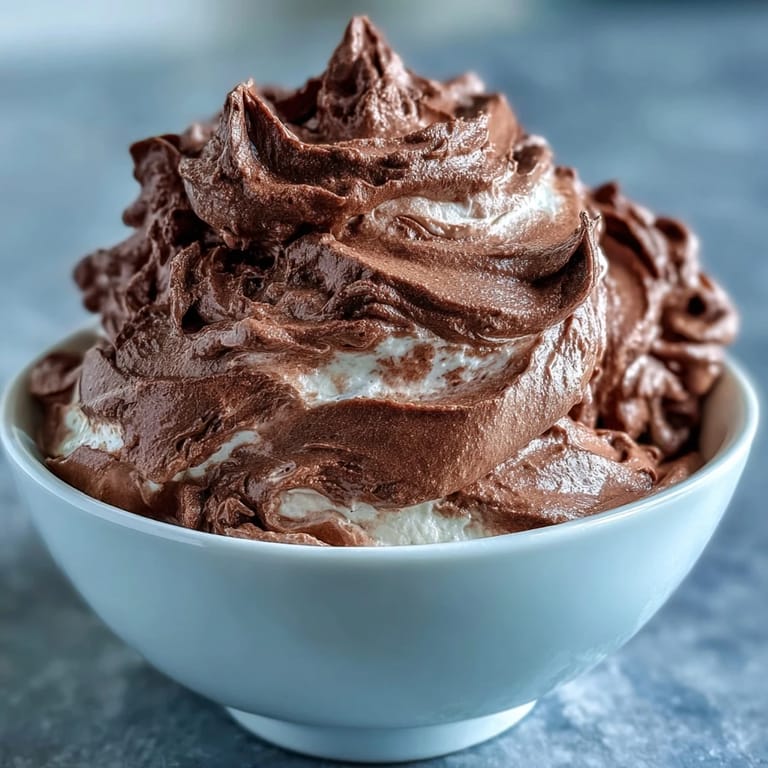
- Fold like you mean it:
- Start by stirring one spoonful of whipped cream into the cooled chocolate to loosen it, then gently fold in the remaining cream in two or three additions using a rubber spatula, turning the bowl as you work. This folding motion keeps all that air you've whipped into the cream, giving you that signature light and fluffy texture instead of dense chocolate soup.
- Chill before using:
- If you want mousse firm enough to slice or pipe, refrigerate it for 30 to 60 minutes until it holds its shape. For a softer, spoonable consistency, use it right away while it's still lightly whipped.
 Save
Save There was an afternoon when my hands were shaking slightly while making this mousse for my grandmother's birthday cake, worried I'd somehow ruin it and disappoint everyone. As I folded that cream into the chocolate and watched it transform into this silky, elegant filling, I realized that some things in cooking are less about perfection and more about showing up and trying. She cried when she tasted it, though I'm fairly certain it was mostly about knowing someone cared enough to make something from scratch.
Why This Mousse Wins Every Time
The genius of chocolate mousse filling is that it's forgiving enough for beginners but elegant enough to impress serious food lovers. Unlike some cake fillings that require precision timing or specialized equipment, this one asks only for clean technique and a gentle hand. The result feels fancy enough to serve at a dinner party but simple enough that you can make it without stress clouding your kitchen time.
Storing and Making Ahead
This mousse truly shines when used the same day, but it keeps beautifully in the refrigerator for up to two days if covered properly. I've learned the hard way that leaving it exposed means it picks up every flavor in your fridge, so invest in a good container or cover the bowl tightly with plastic wrap. Never freeze it, as the mousse separates when thawed and loses that dreamy texture you worked to create.
Flavor Adventures and Personal Tweaks
Once you've mastered the basic recipe, the fun begins with small additions that shift the whole mood of the mousse. A splash of espresso or a pinch of cinnamon stirred into the melted chocolate adds depth without announcing itself too loudly. I've also experimented with a tiny bit of orange zest, a whisper of cardamom, and even a touch of sea salt, and each one tells a slightly different story.
- A teaspoon of instant espresso powder dissolves into the melted chocolate and makes the chocolate flavor punch harder without tasting coffee-like.
- Cinnamon or a pinch of cayenne adds intrigue and warmth that makes people pause and ask what that mysterious something is.
- Remember that less is always more with these additions—you want them to enhance the chocolate, not overshadow it.
 Save
Save This mousse has become my go-to filling for almost every celebration because it transforms simple cakes into something that tastes like love and butter and chocolate all at once. Once you make it, you'll understand why it's been a French kitchen staple for decades.
Questions & Answers
- → What type of chocolate is best for this mousse?
Semi-sweet chocolate with 55–65% cocoa content works best, offering balanced sweetness and rich flavor.
- → How do I achieve the perfect mousse texture?
Whip the heavy cream until soft peaks form, then gently fold it into cooled melted chocolate to maintain volume and fluffiness.
- → Can this mousse be prepared in advance?
Yes, it can be chilled for up to 2 days in the refrigerator, covered tightly to preserve its texture and flavor.
- → Is it possible to add extra flavorings?
Yes, a splash of espresso or a pinch of cinnamon added to the melted chocolate enhances depth and complexity.
- → What is the best way to use this mousse?
Use it for layering cakes, filling cupcakes, or spoon it into cups for an elegant dessert presentation.
- → How long should the mousse chill for firmer results?
Chill the mousse for 30 to 60 minutes to achieve a firmer texture suitable for slicing or piping.