Save
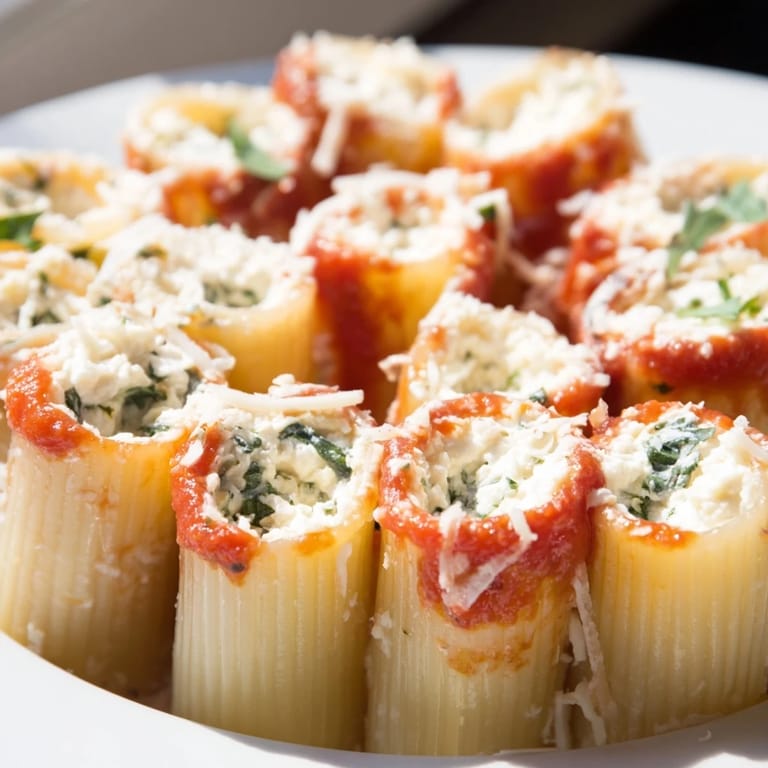
Save The first time I saw honeycomb pasta bake was at my neighbor's dinner party, when she sliced into this golden-topped masterpiece and revealed those perfectly stuffed rigatoni tubes standing like little edible buildings. I was mesmerized by how intentional it looked, how each pasta cylinder held its creamy filling without breaking apart. When she offered me a taste, I understood immediately why she'd gone through the effort—it was comfort food with architecture, a dish that rewards patience with pure visual and culinary satisfaction. Now whenever I make it, I feel that same small thrill watching the filling disappear into each tube, knowing something special is about to happen in the oven.
I made this for my family's Sunday dinner last spring when my mom asked if I could bring something 'a little more interesting than usual,' and this was my response. Watching my eight-year-old nephew ask for seconds because he wanted to see all the cheese inside each piece—that's when I knew it was a keeper. There's something about the honeycomb arrangement that makes people slow down and actually look at what's on their plate.
Ingredients
- Rigatoni pasta: The larger tubes are essential here—they need to stand upright and hold filling without collapsing, so don't substitute with smaller shapes.
- Ricotta cheese: This is your base for a creamy, light filling that won't feel heavy, and it spreads so much easier than trying to stuff the tubes with cold mozzarella.
- Mozzarella cheese: Use the block variety for the filling since pre-shredded contains anti-caking agents that can make it grainy when heated.
- Parmesan cheese: The aged sharpness cuts through the richness and keeps each bite from feeling one-dimensional.
- Fresh basil and parsley: These aren't decoration—they're what make your filling taste like you actually care, not like you opened a jar of premade filling.
- Marinara sauce: A quality sauce matters here because it's the supporting actor to your pasta bake's lead role—taste before committing to a brand.
- Olive oil: Good enough to taste, because you're coating the cooked pasta with it and it needs to add something, not just prevent sticking.
Tired of Takeout? 🥡
Get 10 meals you can make faster than delivery arrives. Seriously.
One email. No spam. Unsubscribe anytime.
Instructions
- Prep your oven and pan:
- Set it to 200°C (400°F) and use that olive oil generously on your springform or deep round pan—parchment on the bottom saves so much heartbreak when it's time to serve. This pan matters because the sides need to hold those tubes upright while they bake.
- Cook the pasta al dente:
- Boil your rigatoni for 2 minutes less than the package says because it's getting baked later and will soften further. Toss it with a little olive oil right after draining so the tubes don't fuse together in a stuck clump.
- Make the filling come alive:
- Mix ricotta, mozzarella, Parmesan, egg, basil, parsley, salt, and pepper in a bowl until it's completely smooth with no lumps—lumpy filling is the only real mistake here. Taste a tiny spoonful and adjust salt and pepper because this is what's going inside every single tube.
- Stand the tubes with intention:
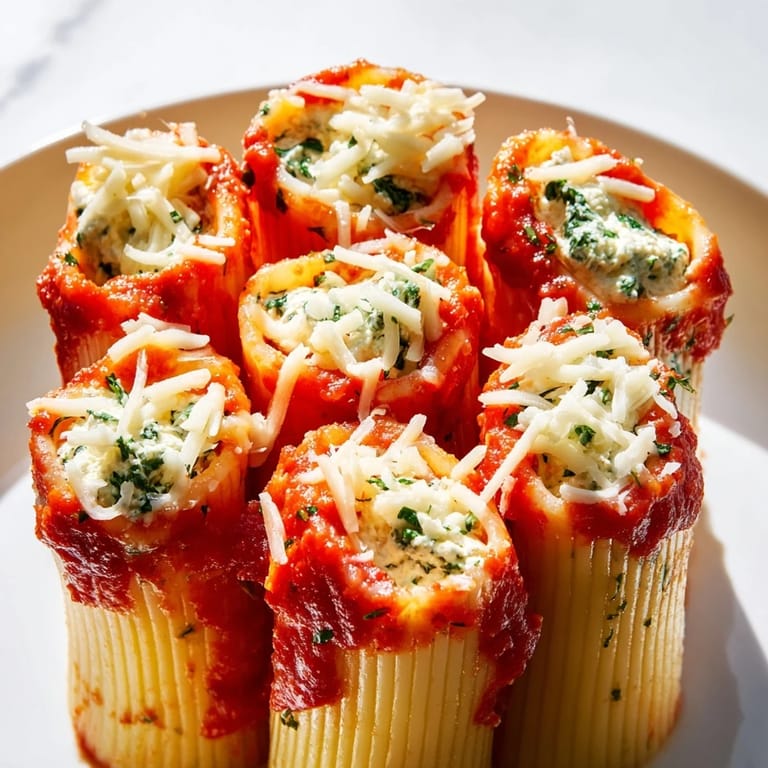
- Pack those cooked rigatoni tubes upright in your prepared pan as tightly as possible, creating a honeycomb pattern that will hold everything together and look stunning when sliced. They should fit snugly so they don't tip over when you fill them.
- Fill each tube with care:
- Use a piping bag or a zip-top bag with the corner snipped off to pipe the cheese mixture into each tube—this is faster and cleaner than trying to spoon it in. Work from the center outward so you can see how full each tube is getting without overstuffing.
- Add the sauce and let it settle:
- Pour marinara sauce evenly over all the filled tubes and gently tap the pan so the sauce flows between them. You want sauce throughout, not just pooled on top.
- Top with the golden finish:
- Sprinkle shredded mozzarella and Parmesan over everything, being generous because these create those gorgeous bubbly golden patches.
- Bake in two stages:
- Cover with foil loosely and bake for 25 minutes, then remove the foil and bake 10 more minutes until the cheese is bubbly and golden. The foil protects the cheese from browning too fast before the pasta finishes cooking through.
- Rest before serving:
- Let it stand for 10 minutes after coming out of the oven—this firms everything up just enough to slice without the filling oozing everywhere, and it lets the temperature settle to actually enjoyable for eating.
 Save
Save There's a moment about halfway through baking when the whole kitchen smells like bubbling cheese and tomato, and you know you've done something right. My partner walked in during that moment last time and just stood there breathing it in, no words needed, and that's exactly what this dish should do to people.
Why This Dish Feels Special
Honeycomb pasta bake walks this beautiful line between homemade elegance and comfort food simplicity. It's not pretentious—there are no complicated techniques or hard-to-find ingredients—but it looks like you spent hours in the kitchen when you really just spent 25 minutes prepping. That combination is rare, and it's why people remember this dish long after the meal ends.
Flexibility and Variations
This recipe is more forgiving than you'd think about substitutions. I've added sautéed spinach to the filling when I had it on hand, and once I mixed in some cooked Italian sausage for a friend who needed more protein. The ricotta can be swapped for cottage cheese if that's what's in your fridge, though the texture shifts slightly toward less creamy. The core of the dish—standing tubes, cheese filling, marinara sauce—that part stays the same and everything still works.
Serving and Pairing Thoughts
Slice this at the table if you can, because watching the layers reveal themselves is half the appeal. Serve it with a simple green salad dressed in lemon vinaigrette to cut through the richness, and if you're drinking wine, Chianti is the obvious choice but honestly any red wine that tastes good to you will feel right.
- Let the bake rest those 10 minutes or it will collapse and bleed everywhere—patience is your friend here.
- Make it earlier in the day if you want and refrigerate it unbaked, then just add 10 minutes to the baking time since it'll be cold.
- Leftover slices reheat beautifully in a 160°C oven covered with foil until warm through, no microwave required.
 Save
Save This recipe taught me that sometimes the most memorable dishes aren't the complicated ones—they're the ones that look like you tried, taste like you care, and bring people together without stress. That feels worth making again.
Questions & Answers
- → How do I keep the rigatoni from sticking together?
Cook rigatoni slightly under al dente and toss with olive oil after draining to prevent sticking before arranging them upright.
- → Can I prepare this dish in advance?
Yes, assemble the filled pasta and refrigerate before baking. Allow extra baking time if baking from cold.
- → What cheeses are best for the filling?
A blend of ricotta, mozzarella, and Parmesan creates a creamy and flavorful filling with good texture.
- → Is it necessary to stand rigatoni upright?
Yes, standing rigatoni upright allows for even filling and a distinctive honeycomb appearance once baked.
- → Can I add vegetables or proteins to this dish?
Yes, sautéed spinach or cooked Italian sausage can be mixed into the cheese filling for added flavor and variety.