 Save
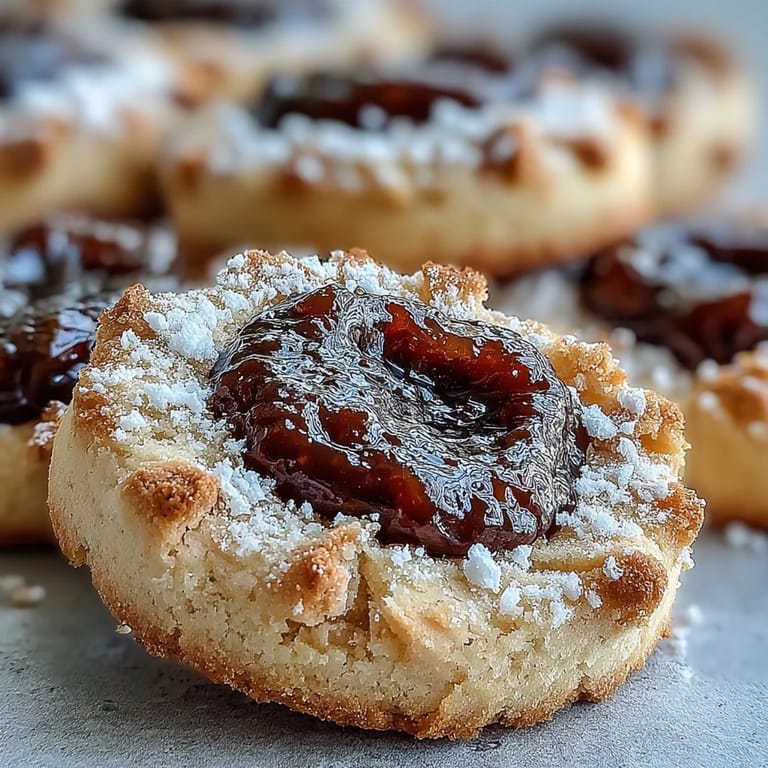
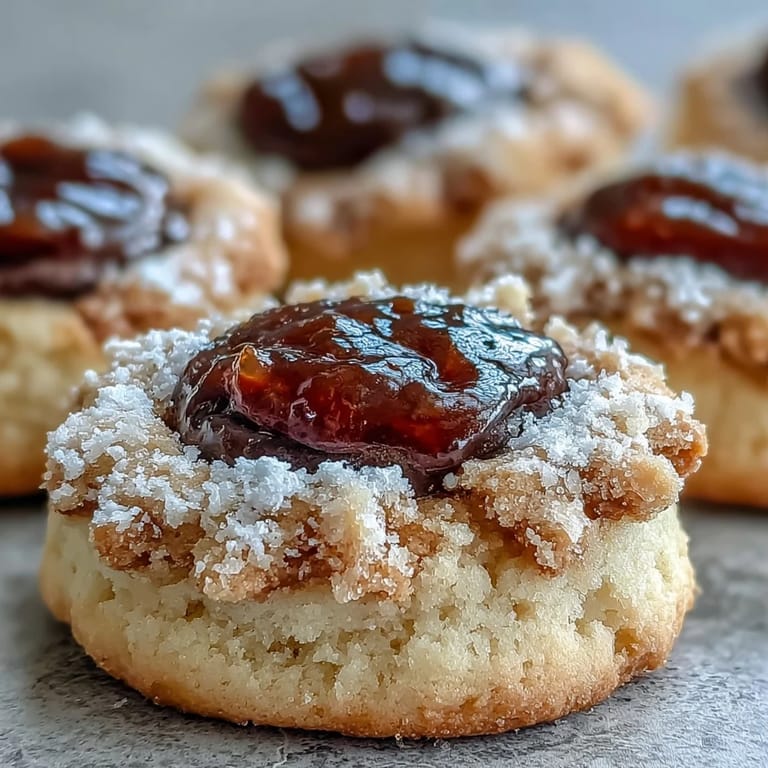
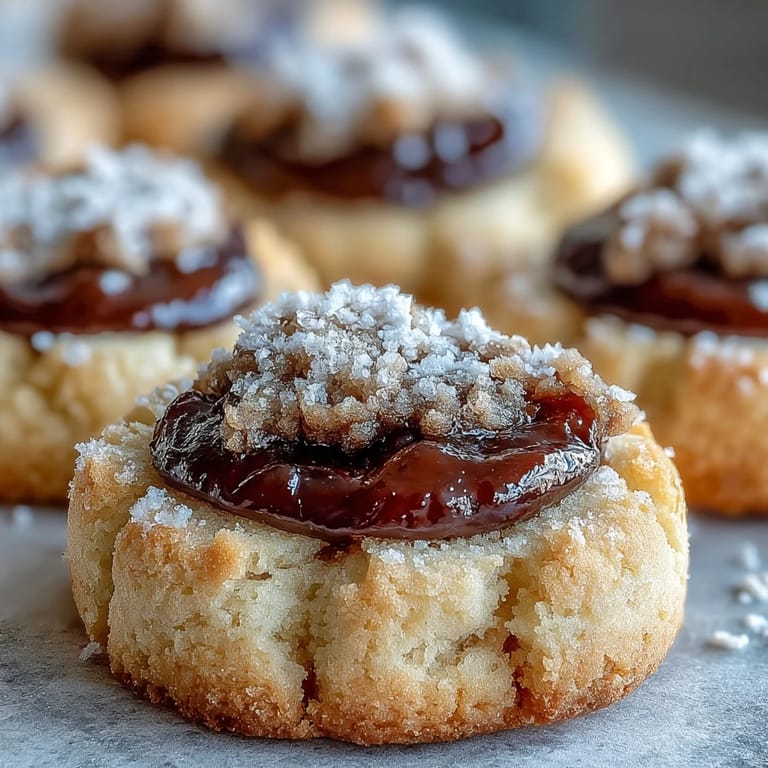
Save My abuela kept a jar of guava paste on her kitchen shelf year-round, and I spent countless afternoons watching her press her thumb into warm cookie dough, creating little pockets for that sweet-tart filling. These torticas de guayaba became my quiet rebellion against store-bought desserts—simple enough that even my impatient teenage self could master them, yet elegant enough to impress anyone who bit into one. The buttery vanilla base melts against your tongue while the guava jam cuts through with a tropical brightness that feels like sunshine in cookie form. There's something almost meditative about making these, the repetitive motion of pressing, filling, baking, cooling. Once you taste one warm from the oven with the jam still slightly soft, you'll understand why they've been passed down through generations.
I made these for my neighbor Maria one Tuesday when she'd just moved in, still surrounded by cardboard boxes and the stress of a new city. She bit into one, closed her eyes, and whispered that they tasted exactly like her mother's—a moment I'll never forget. Food has this strange power to collapse distance and time, and watching her find a piece of home in my kitchen reminded me why I cook these cookies over and over.
Ingredients
- Unsalted butter (1 cup, softened): Room temperature is non-negotiable here—it creams properly only when it's genuinely soft, almost pillowy to the touch.
- Granulated sugar (2/3 cup): This amount gives you sweetness without overwhelming the delicate vanilla or chocolate notes that follow.
- Large egg yolk: The yolk creates richness and tenderness; the white would make these cookies tough and dry.
- Vanilla extract (1 teaspoon): Use real vanilla if possible—the flavor difference between genuine and imitation is honestly heartbreaking in such a simple cookie.
- All-purpose flour (2 cups): Measure by spooning and leveling, not scooping straight from the bag, or you'll end up with too much flour and dense cookies.
- Salt (1/4 teaspoon): This small amount awakens the vanilla and balances the sweetness without announcing itself.
- Unsweetened cocoa powder (2 tablespoons, optional): If you choose the chocolate variation, sift it together with the flour to avoid lumps.
- Guava jam or paste (1/2 cup, softened): If your guava paste is rock-hard straight from the jar, warm it gently with a splash of water until it's spreadable—cold, stiff paste will crack the cookies as they bake.
Tired of Takeout? 🥡
Get 10 meals you can make faster than delivery arrives. Seriously.
One email. No spam. Unsubscribe anytime.
Instructions
- Preheat and Prepare:
- Set your oven to 350°F and line your baking sheet with parchment paper so nothing sticks and cleanup becomes almost pleasant. This 10-minute head start ensures even baking from the moment your cookies hit the oven.
- Cream Butter and Sugar:
- Beat the softened butter and sugar together for about 2 to 3 minutes until the mixture looks pale, fluffy, and almost doubled in volume—this aeration creates tender cookies. You'll know it's ready when it looks like soft clouds and smells like sweet butter.
- Add Egg Yolk and Vanilla:
- Pour in the egg yolk and vanilla, then beat until completely combined and the mixture looks smooth and slightly glossy. Scrape down the sides of the bowl with a spatula to make sure everything is evenly mixed.
- Mix in Flour and Salt (Vanilla or Chocolate):
- Gradually add the flour and salt, stirring on low speed or by hand until the dough just comes together—overmixing creates tough cookies. If you're making the chocolate variation, whisk the cocoa powder into the flour before adding it to ensure even color and flavor throughout.
- Shape the Dough:
- Scoop tablespoon-sized portions and roll them between your palms into balls, placing them about 2 inches apart on your parchment paper. The dough should be soft but not sticky; if it's too warm, refrigerate for 10 minutes.
- Create the Indentations:
- Using your thumb or the back of a spoon, gently press into the center of each ball to create a deep pocket—this is where the magic happens. Don't be shy; go deep enough that the jam won't spill out during baking.
- Fill with Guava:
- Spoon about 1/2 teaspoon of softened guava jam into each indentation, nestling it in so it stays put in the oven. If your guava paste is too thick, warm it slightly with water until it's the consistency of peanut butter.
- Bake Until Golden:
- Bake for 12 to 14 minutes, watching until the edges turn just golden—they should still feel slightly soft in the centers when you remove them. The guava filling will bubble and deepen in color, which is exactly what you want.
- Cool and Transfer:
- Let the cookies rest on the baking sheet for 5 minutes so they firm up enough to move, then transfer them to a wire rack to cool completely. They'll continue to cook slightly from residual heat, so don't leave them on the hot sheet too long.
 Save
Save There was this one Christmas when my cousin brought her new husband to our family dinner, and he bit into one of these cookies with zero expectations—he'd never had guava before. Watching his face change from polite curiosity to genuine delight was worth every thumbprint, every moment tending to the oven. That's when I realized these aren't just cookies; they're tiny edible conversations between cultures and generations.
The Chocolate Variation
The chocolate base transforms these from tropical to sophisticated in a way that surprised me the first time I tested it. By replacing just 2 tablespoons of flour with unsweetened cocoa powder, you get a subtle chocolate flavor that doesn't overpower the guava but creates this beautiful interplay of bitter and sweet. My friends who usually reach for chocolate desserts ended up loving this version just as much as the vanilla, which tells you something about how well these flavors dance together. The cocoa also deepens the cookie's color, making them look slightly more elegant on a plate.
Storage and Keeping
These cookies live happily in an airtight container for up to five days, though honestly they rarely last that long in my house. I've found that keeping them at room temperature in a tin with parchment paper between layers prevents them from sticking together and keeps them fresher longer. If you want to bake ahead for an event, you can freeze the unbaked dough balls for up to two weeks—just add a minute or two to the baking time straight from frozen. The guava filling actually stays soft and spreadable even after days of storage, which makes these endlessly convenient for both everyday snacking and fancy entertaining.
Making Them Your Own
The beauty of this recipe is how willing it is to bend without breaking, which means you can play around once you've made them once or twice and know how they should feel. Raspberry, apricot, or even dulce de leche work beautifully in place of guava, and I've experimented with everything from a light lemon zest in the dough to a pinch of cinnamon mixed with the cocoa powder. One afternoon I was feeling fancy and dusted the finished cookies with powdered sugar mixed with a tiny bit of ground cardamom—unexpected, delicious, and suddenly they felt like something from a pastry shop. The base recipe is so forgiving that you can treat it as a canvas for whatever flavors you're craving.
- Dust finished cookies with powdered sugar for extra elegance and a subtle sweetness boost.
- Experiment with different preserves like strawberry, apricot, or raspberry to discover your personal favorite.
- A tiny pinch of nutmeg or allspice added to the dough brings warmth without changing the cookies' essential character.
 Save
Save Make these when you want something that tastes like home, whether that home is a Caribbean kitchen, a grandmother's hands, or simply a moment when someone you love bit into sweetness and smiled. They're the kind of cookie that proves you don't need complicated techniques or exotic ingredients to create something truly memorable.
Questions & Answers
- → What makes torticas de guayaba different from regular thumbprint cookies?
The defining feature is the guava filling, which provides a distinct tropical sweetness and tartness that sets these Cuban cookies apart from traditional raspberry or apricot thumbprints. The dough is notably richer and more tender, using a higher butter ratio typical of Latin American baking traditions.
- → Can I make the dough ahead of time?
Absolutely. The dough refrigerates well for up to 3 days when wrapped tightly in plastic. You can also freeze the dough balls for up to 3 months—just thaw slightly before pressing the thumbprint and adding the guava filling. This makes them perfect for holiday baking prep.
- → Why is my guava paste too thick to work with?
Guava paste naturally has a dense, thick consistency. Simply warm it gently with a splash of water over low heat, stirring until it reaches a spoonable consistency. Let it cool slightly before filling your cookies. Alternatively, use guava jam which requires no preparation.
- → How do I store these cookies?
Store in an airtight container at room temperature for up to 5 days. Place parchment paper between layers to prevent sticking. For longer storage, freeze unfilled cookies for up to 3 months and add fresh guava filling after thawing. The guava filling can make cookies softer over time.
- → What's the best way to achieve the perfect thumbprint indentation?
Use your thumb to press firmly into the center of each dough ball, creating a deep well that's about 1/2 inch wide. If the dough cracks at the edges, simply smooth it with your fingers. The indentation should be deep enough to hold a generous 1/2 teaspoon of filling without overflowing during baking.
- → Can I substitute the guava filling?
While guava is traditional, you can use any thick fruit preserve. Raspberry, apricot, or even fig preserves work wonderfully. Lemon curd adds a bright, citrusy contrast to the buttery dough. Just ensure whatever filling you choose is thick enough to hold its shape during baking.